0.1 Pre-Flight Check
Before we start, verify that you have the necessary tools installed on your computer.
Open your Terminal and run these commands:
git --version
node -v
npm -v
🔍 What to check:
- For Git: You should see something like
git version 2.x.x.
- For Node: You should see something like
v18.x.x or v20.x.x.
- For npm: You should see something like
9.x.x or 10.x.x.
🛠️ Problem: "command not found" or version is missing
If Git is missing: Download and install it from git-scm.com.
If Node is missing: Download and install the "LTS" version from nodejs.org.
If npm is missing: Reinstall Node.js (npm is included with it).
Note: After installing, you must close your Terminal completely and open a new one.
How often do you do these steps?
- First time on this computer: Do everything in this guide.
- Next time: You usually keep the SSH key (Step 3) and the cloned website folder (Step 4). You mainly repeat Steps 5–9 for a new project.
1. Workspace Setup
First, let's create a clean place on your computer to keep your code. We will create a folder called repos in your home directory.
Copy and paste these commands one by one:
# This takes you to your Home folder
cd ~

# This creates a new folder named 'repos' (safe if it already exists)
mkdir -p repos

# This goes inside that new folder
cd repos
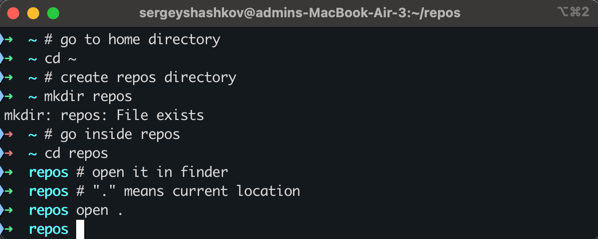
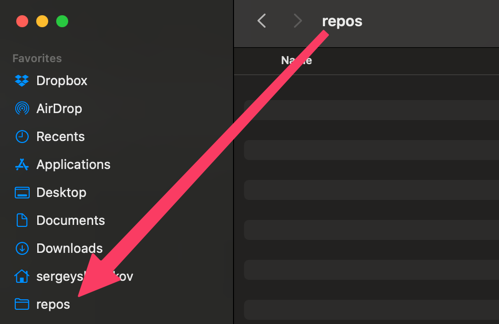
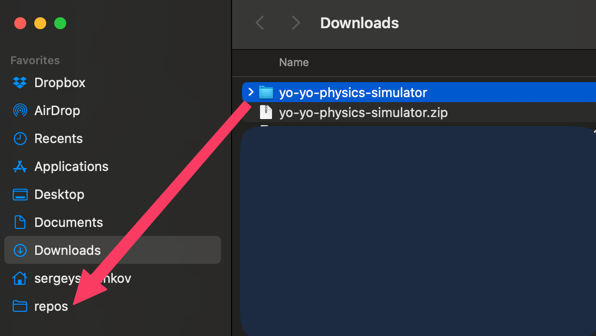
Tip for Mac Users: It is very useful to have this folder in your "Favorites" list in Finder. Run this command to open the folder window:
open .
When the Finder window opens, drag the folder icon from the very top title bar into the "Favorites" list on the left sidebar.
2. GitHub Registration and Repository
We need a place on the internet to store your code so others can see it.
Goal: Create your personal website repository (this is what GitHub Pages publishes).
- Go to GitHub.com and sign up (or log in).
- Click the + icon (top right) → New repository.
- Important: Name the repository exactly like this:
nickname.github.io
(Double check that you spelled your username correctly!)
- Owner: nickname
- Repository name: nickname.github.io
- Public: Select "Public".
- Add README: Leave this unchecked (empty).
Click Create repository.
✅ Quick self-check: The repository name must end with .github.io. It is not your project name.
3. Configure Git and SSH Keys (one-time)
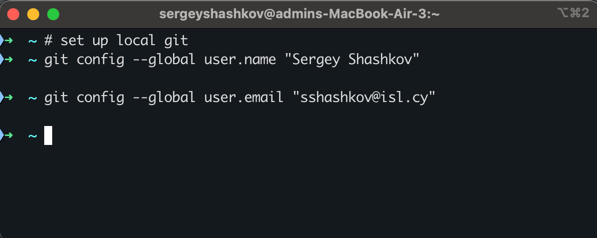
If this is your first time using Git on this computer, you need to introduce yourself.
git config --global user.name "Your Name"
git config --global user.email "surname@isl.cy"
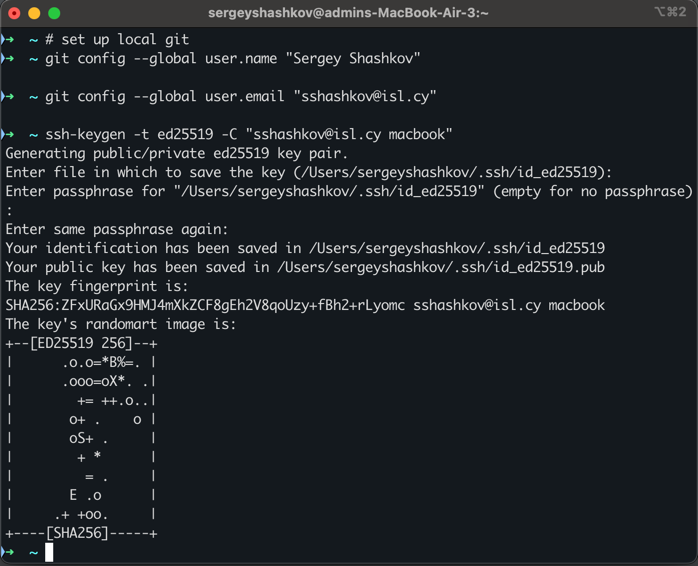
3.1: Generate the key
Important: After running the command below, the computer will ask where to save file and for a passphrase.
DO NOT type anything. Just press ENTER three times.
ssh-keygen -t ed25519 -C "surname@isl.cy"
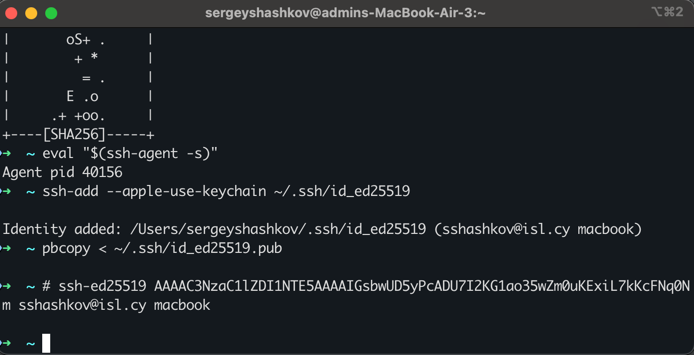
3.2: Activate the key
eval "$(ssh-agent -s)"
ssh-add --apple-use-keychain ~/.ssh/id_ed25519
3.3: Upload key to GitHub
Now copy the key to your clipboard:
pbcopy < ~/.ssh/id_ed25519.pub
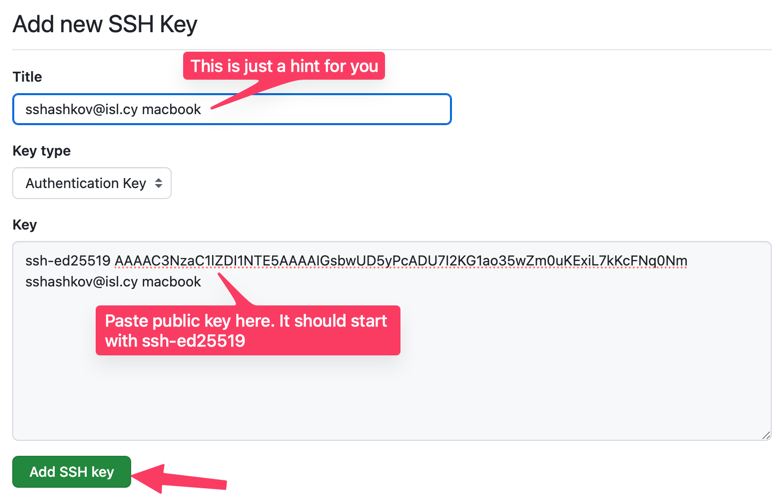
1. Go to GitHub website -> Click your profile photo (top right) -> Settings.
2. On the left menu, click SSH and GPG keys -> New SSH Key.
3. Title: "Macbook" (or any name).
4. Key: Paste (Command+V). It should start with ssh-ed25519.
5. Click Add SSH key.
🔍 Checkpoint: Verify your connection
This is the most critical step. Run this command to see if GitHub accepts your ID:
ssh -T git@github.com
Success: You see Hi nickname! You've successfully authenticated...
(It is okay if it says "GitHub does not provide shell access" afterwards).
🛠️ Problem: It asks: "Are you sure you want to continue connecting (yes/no/[fingerprint])?"
This is normal the first time. Type yes and press Enter, then run ssh -T git@github.com again.
🛠️ Problem: "Permission denied (publickey)"
This means the key on your computer does not match the one you pasted on GitHub.
- Go to GitHub Settings -> SSH Keys and Delete the key you just added.
- In terminal run:
rm ~/.ssh/id_ed25519* (this deletes the broken local key).
- Go back to Step 3.1 and carefully repeat the process.
- Ensure you use
pbcopy and do not select text manually with the mouse (this avoids missing characters).
4. Clone and Prepare Folders
Pay attention! We will have two different folders inside your repos directory.
- 📂
myproject: This is your Workbench. You write code here.
- 📂
nickname.github.io: This is your Public Display. Files here go to the internet.
# Ensure we are in the repos folder
cd ~/repos

# 1. Download your GitHub Pages repository (it is currently empty)
git clone git@github.com:nickname/nickname.github.io.git

# 2. Create a folder for your source code
mkdir myproject
🔍 Checkpoint: Check folder structure
Run this command:
ls -F ~/repos
You should see exactly two items:
1. myproject/
2. nickname.github.io/
🛠️ Problem: Folders are missing or named wrong
If you see only one folder, or if the GitHub folder doesn't have your name on it:
Option A (recommended): Use Finder and delete the wrong folders from ~/repos.
Option B (Terminal, permanent delete): Copy/paste carefully (this permanently deletes folders):
rm -rf ~/repos/myproject
rm -rf ~/repos/nickname.github.io/
Then run the commands in Step 4 again carefully.
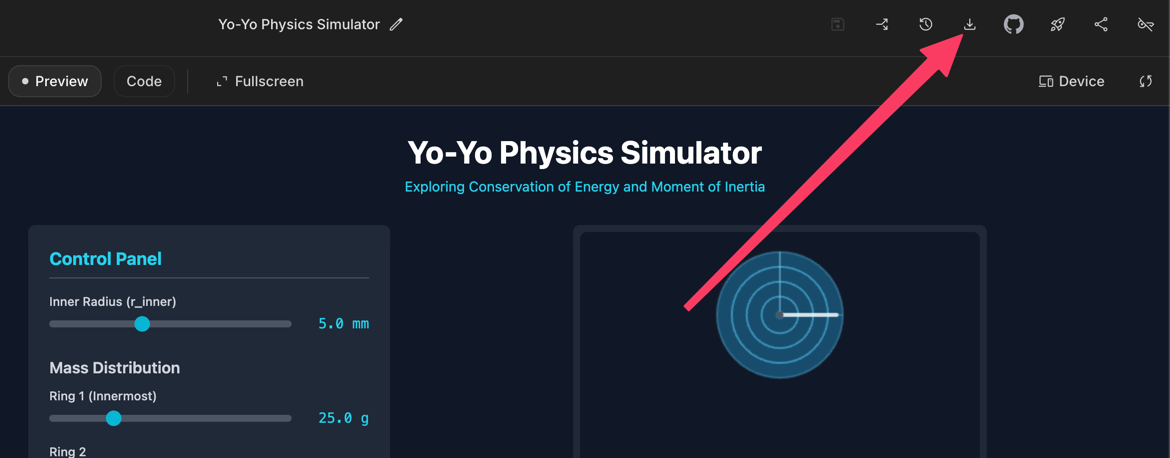
5: Move Files from Studio
1. Download your project from Google AI Studio (Build -> Download).
2. Extract the zip file in Downloads.
3. Select ALL files inside the extracted folder and COPY them.
4. Go to repos -> myproject folder and PASTE them.
🔍 Checkpoint: Avoid the "Nesting" Trap
Many students accidentally put a folder inside a folder. Run this to check if you did it right:
ls ~/repos/myproject/package.json
Success: It prints the path to the file.
Failure: It says No such file or directory.
🛠️ Problem: "No such file or directory"
This means you pasted the parent folder instead of the contents.
1. Type open ~/repos/myproject to see what's wrong.
2. If you see another folder inside (like project-name), go inside it.
3. Select all files (Cmd+A), drag them OUT to the main myproject folder.
4. Delete the empty folder.
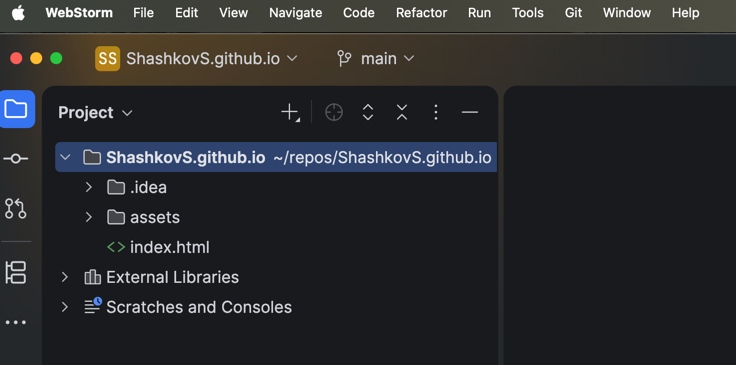
6. Install WebStorm and open your project
1. Open WebStorm. Click Open.
2. Navigate to repos -> myproject and click Open.
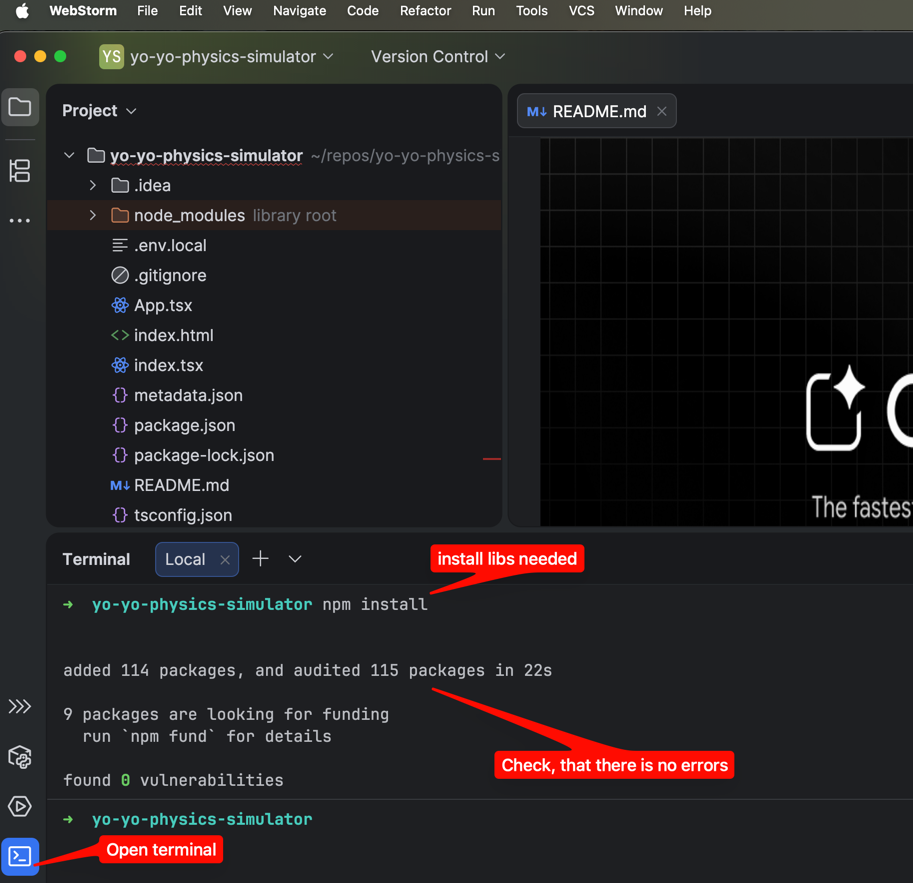
7. Install and Build
Inside WebStorm, click Terminal at the bottom left.
🔍 Checkpoint: Are you in the right folder?
In the WebStorm Terminal, run:
pwd
You should see a path ending with /repos/myproject.
npm install
🛠️ Problem: "command not found: npm"
You did not install Node.js (see Step 0.1 at the top of the page).
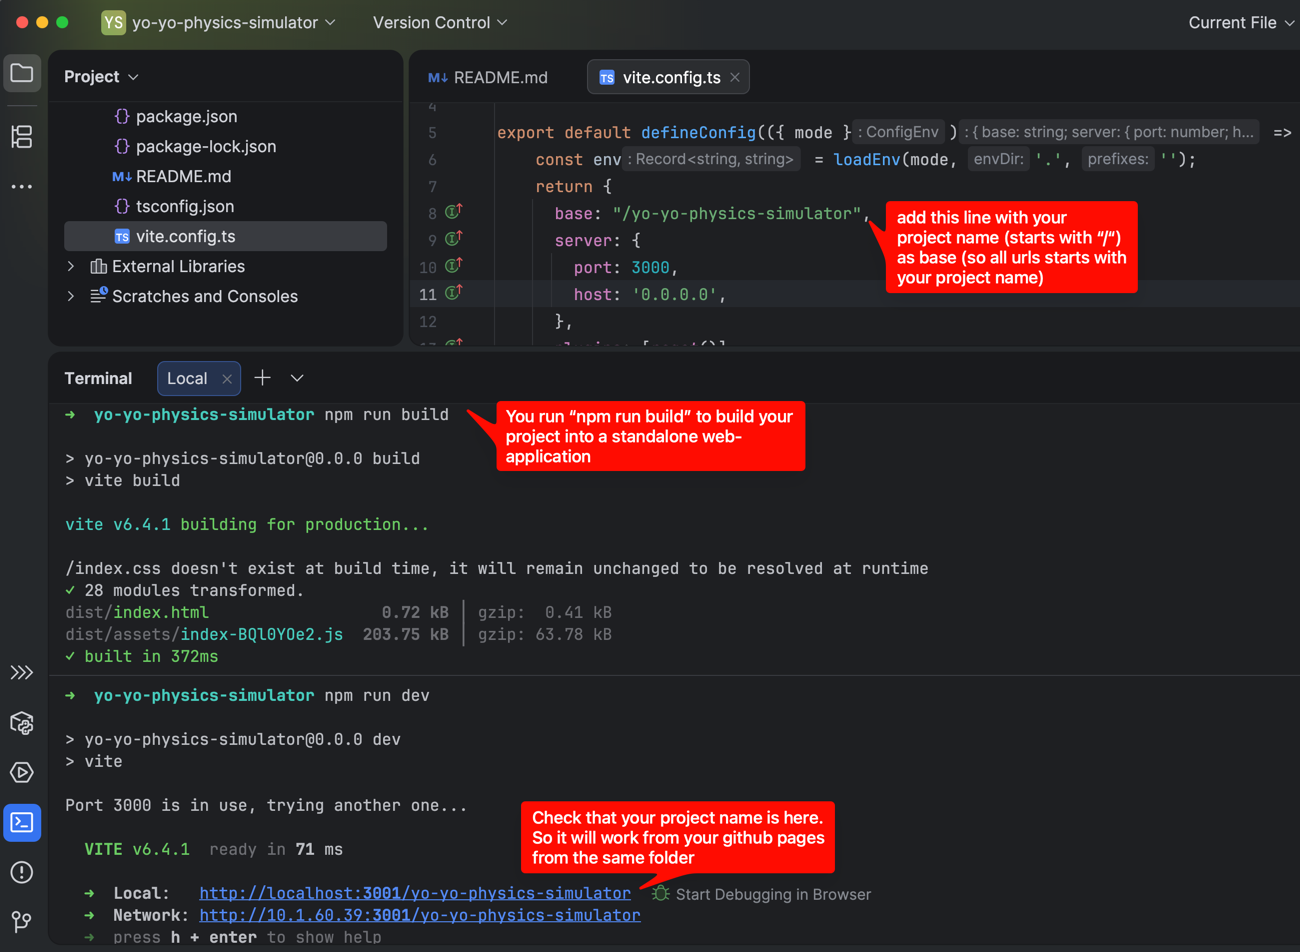
7.1. Update configuration for GitHub (CRITICAL)
Your website will live at: https://nickname.github.io/myproject/
However, the default code assumes it lives at the root /. We must fix this mapping.
❌ Without base: Browser looks for https://site.io/style.css (404 Error)
✅ With base: Browser looks for https://site.io/myproject/style.css (Success)
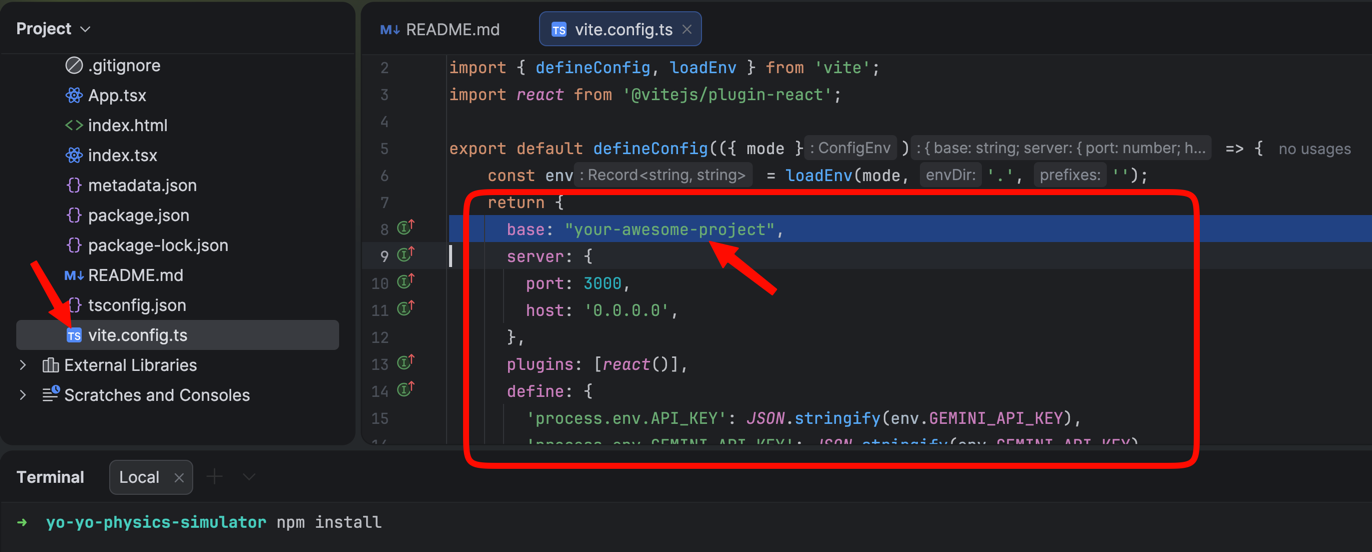
1. Open vite.config.ts in WebStorm.
2. Find the config object that starts with return {.
3. Add (or update) the base line exactly like this:
export default defineConfig(({ mode }) => {
  // ... some code ...
  return {
    base: "/myproject/",    // <--- ADD THIS LINE (Watch the slashes!)
    server: {
      // ...
🛠️ Problem: I don't have vite.config.ts
Look for one of these files instead: vite.config.js or vite.config.mjs.
The fix is the same: set base to "/myproject/".
🛠️ Problem: I already have a base: line
Replace its value with "/myproject/" (keep the leading and trailing slashes).
7.2. Build and Test
# Create the optimized website files
npm run build
To check if it works locally, run npm run dev. Press Ctrl+C to stop when done.
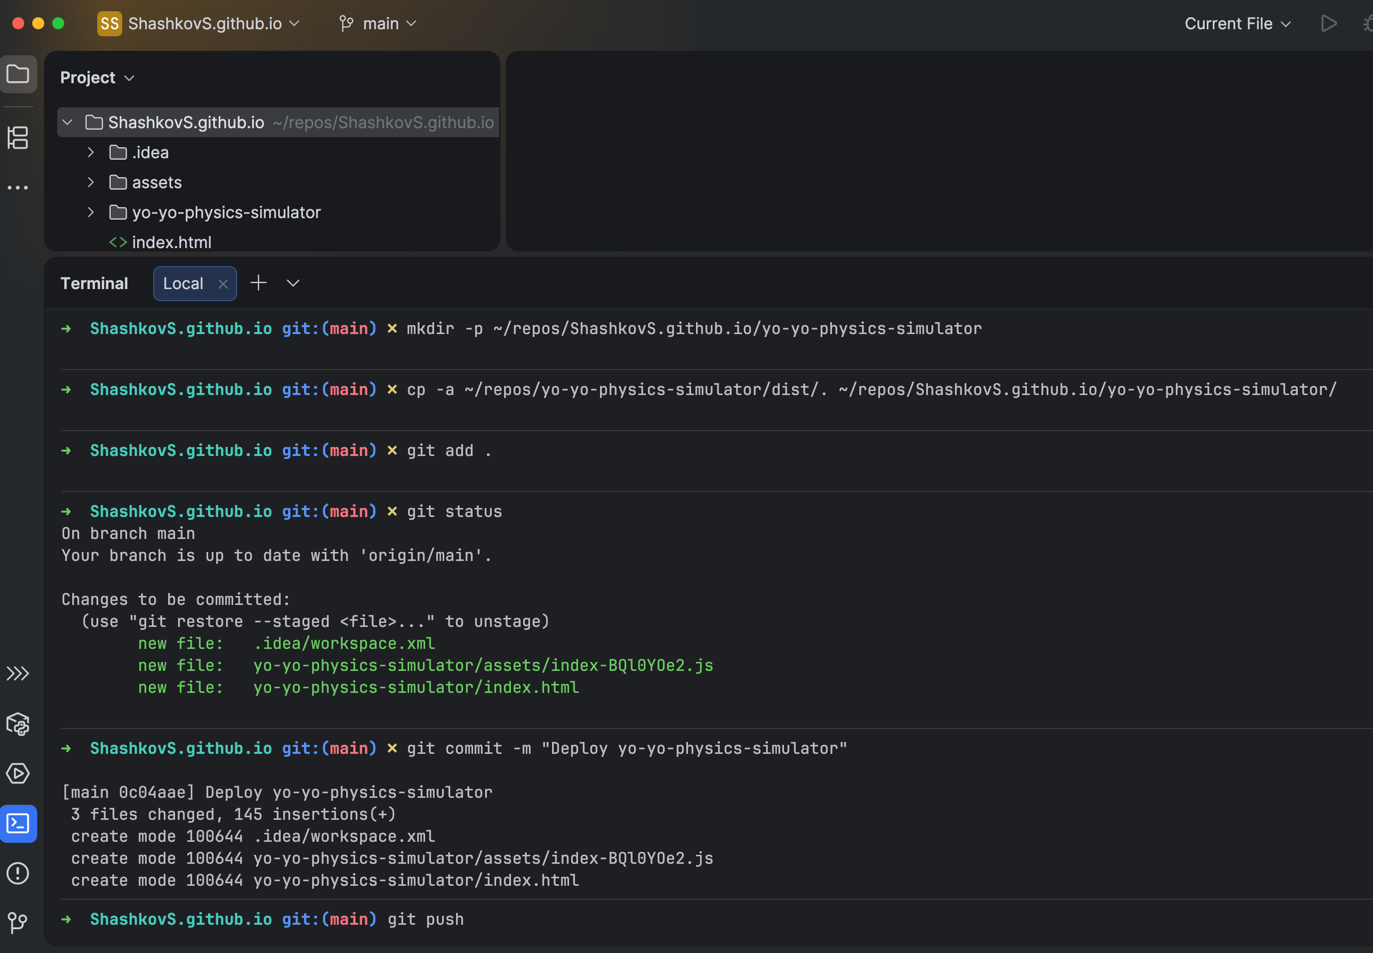
8. Copy Result and Push to GitHub
We will use the terminal to move the built site (dist) to the GitHub folder.
# 0. Go to the GitHub repo folder
cd ~/repos/nickname.github.io

# 1. Create a folder for this specific project inside your website
mkdir -p myproject

# 2. COPY the finished site. Warning: Type this carefully!
# (The spaces and dots matter)
cp -a ~/repos/myproject/dist/. ./myproject/
🔍 Checkpoint: Did the copy work?
Run this command to verify files exist before uploading:
ls ./myproject/index.html
Success: It shows ./myproject/index.html.
Failure: "No such file or directory".
🛠️ Problem: Copy failed
1. Did you run npm run build in Step 7.2? If not, the dist folder is empty.
2. Check your paths. Type ls ~/repos/myproject/dist. If that complains, your build failed.
If the check passed, upload to GitHub:
# 3. Check status (You should see red or green text)
git status

# 4. Upload
git add .
git commit -m "Deploy myproject"
git push
🛠️ Problem: git commit says "nothing to commit"
This means Git did not detect any changes.
- Make sure you ran
npm run build in Step 7.2.
- Make sure the copy step in Step 8 ran without errors.
- Run
ls ./myproject/ and confirm you see index.html.
9: Result
It is done! Wait 1–2 minutes (sometimes up to 10) for GitHub to process the files.
To check status: https://github.com/nickname/nickname.github.io/settings/pages
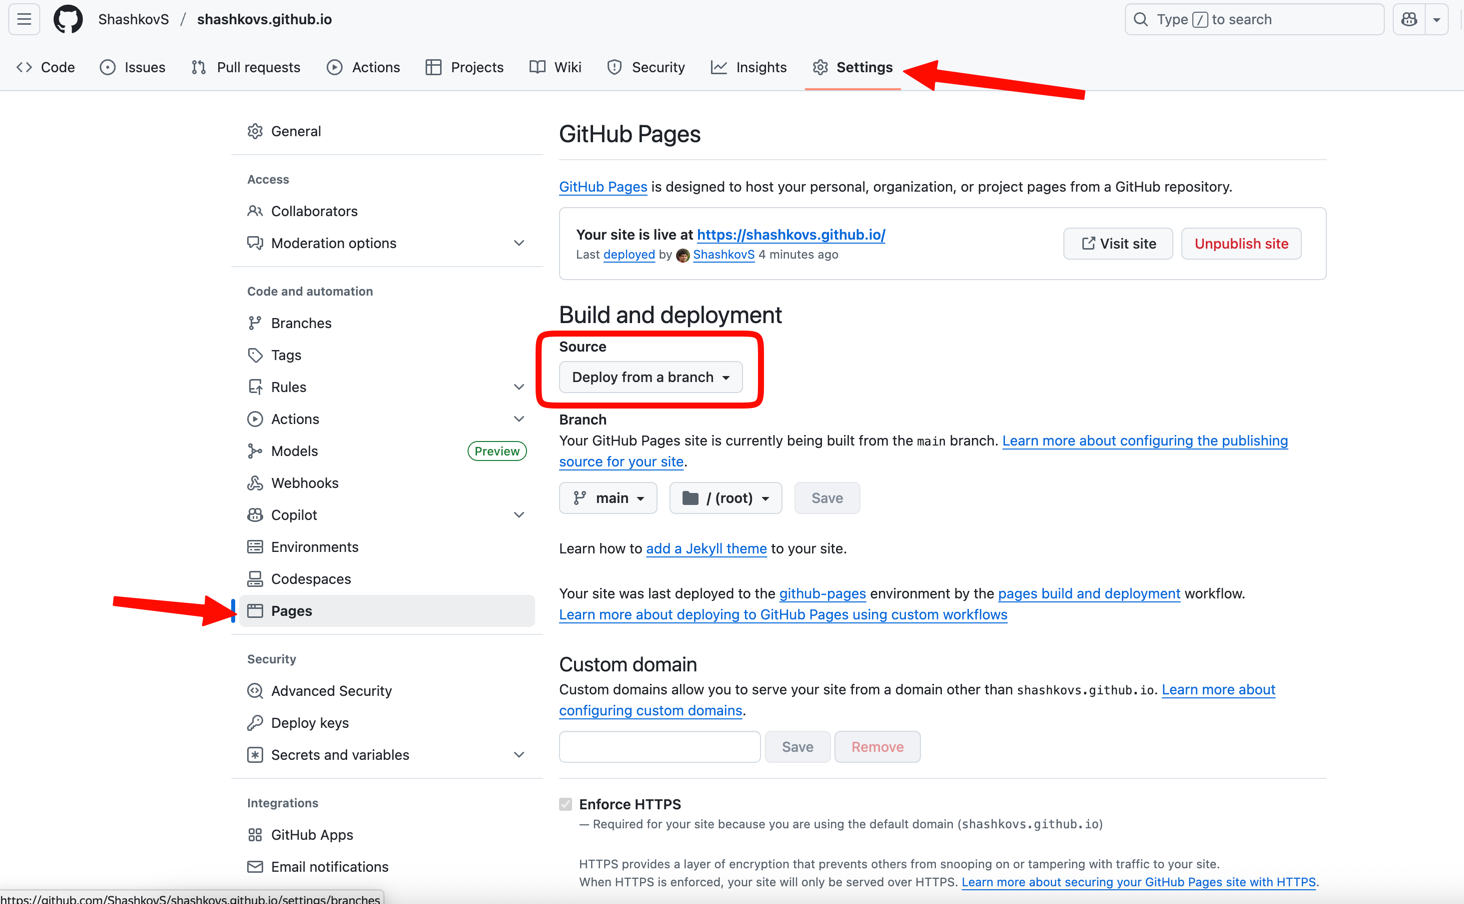
You can now open your web application at:
https://nickname.github.io/myproject/
Send this link to your friends or teacher!
🛠️ Problem: The page is white / 404 Error
If the page loads but is blank, open Developer Tools (Right Click -> Inspect -> Console).
If you see red errors saying "Failed to load resource":
You messed up Step 7.1 (Vite Base Path). The browser is looking for files in the wrong place.
Fix: Fix vite.config.ts, run npm run build, and repeat Step 8 to copy and push again.